Ultimate Guide on How to Fit Downlights: Step-by-Step Instructions

-
Quick Links:
- Introduction
- What Are Downlights?
- Types of Downlights
- Benefits of Downlighting
- Pre-Installation Considerations
- Tools and Materials Needed
- Step-by-Step Installation Guide
- Common Mistakes to Avoid
- Case Studies and Examples
- Expert Insights
- FAQs
Introduction
Fitting downlights can dramatically enhance the aesthetic and functional aspects of your home. With the right guidance, this task can be a straightforward DIY project. In this ultimate guide, we will cover everything you need to know about fitting downlights, including types, benefits, tools required, and a comprehensive step-by-step installation guide.
What Are Downlights?
Downlights, also known as recessed lights or can lights, are light fixtures installed into a hollow opening in the ceiling. They offer a sleek, modern look and are popular in both residential and commercial spaces.
Types of Downlights
- LED Downlights: Energy-efficient with a long lifespan.
- Halogen Downlights: Bright light but less energy-efficient.
- CFL Downlights: Compact fluorescent lights that are eco-friendly.
- Smart Downlights: Connected lighting that can be controlled via smartphone.
Benefits of Downlighting
- Space-Saving: Ideal for low ceilings.
- Versatile: Suitable for various room styles.
- Energy-Efficient: Especially with LED options.
- Enhanced Ambiance: Creates a warm and inviting atmosphere.
Pre-Installation Considerations
Before you begin, consider the following:
- Assess the ceiling space and ensure it can accommodate downlights.
- Plan the layout for even light distribution.
- Check local building codes regarding electrical work.
Tools and Materials Needed
To fit downlights, you'll need the following tools and materials:
- Downlight fixtures
- Wire cutters/strippers
- Drill and drill bits
- Voltage tester
- Electrical tape
- Safety goggles
- Measuring tape
Step-by-Step Installation Guide
Step 1: Turn Off Power
Safety first! Ensure the power is turned off at the circuit breaker.
Step 2: Mark the Locations
Using a measuring tape, mark where you want to place the downlights. A good rule of thumb is to space them about 4-6 feet apart.
Step 3: Cut the Holes
Using a drywall saw, cut holes in the ceiling at the marked locations. Ensure the holes are the correct size for the downlight fixtures.
Step 4: Run the Electrical Wiring
Run the electrical wire from the power source to each downlight location. Secure the wiring neatly to avoid damage.
Step 5: Connect the Wiring
Connect the wiring to the downlight according to the manufacturer's instructions. Typically, this will involve connecting the black (live), white (neutral), and green (ground) wires.
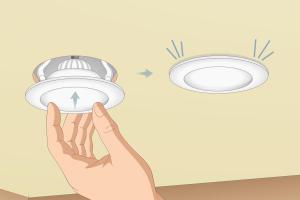
Step 6: Install the Downlights
Insert the downlight fixtures into the holes and secure them according to the product instructions.
Step 7: Test the Lights
Turn the power back on and test the lights to ensure they work correctly.
Common Mistakes to Avoid
- Not checking ceiling space before installation.
- Improper wire connections.
- Ignoring local building codes.
Case Studies and Examples
Consider a recent home renovation project where downlights were installed in a small kitchen. The addition of LED downlights transformed the space, making it brighter and more inviting, while also reducing energy costs by 30% over traditional lighting.
Expert Insights
Lighting designers emphasize the importance of layering light in any space. Downlights can serve as the primary source, but combining them with ambient and accent lighting can enhance the overall look and functionality of the room.
FAQs
1. What is the best spacing for downlights?
Typically, downlights should be spaced 4-6 feet apart for even light distribution.
2. Can I install downlights myself?
Yes, provided you follow safety guidelines and local electrical codes.
3. What type of downlight is most energy-efficient?
LED downlights are the most energy-efficient option available.
4. How do I choose the right size downlight?
Consider the ceiling height and the purpose of the room when selecting the size of your downlights.
5. What color temperature is best for downlights?
A color temperature of 2700K to 3000K is ideal for creating a warm, inviting atmosphere.
6. Are downlights dimmable?
Many modern downlights are dimmable, but ensure you use compatible dimmer switches.
7. How can I maintain my downlights?
Regularly clean the fixtures and check for any flickering or dimming, which may indicate a need for replacement.
8. Do downlights require insulation?
Yes, if your downlights are not rated for direct contact with insulation, ensure they are installed with appropriate clearance.
9. What is the lifespan of LED downlights?
LED downlights typically have a lifespan of 15,000 to 50,000 hours.
10. Can I mix different types of downlights?
While you can mix types, it's best to maintain consistency for a cohesive look.
Random Reads
- A step by step guide to installing a replacement ribbon cable
- Manage android home screen icons
- How to crop a picture in word
- How to automatically forward text messages to another phone
- How to catch heatran pokemon black white 2
- How to clean sump pit
- How to clean stucco
- How to know if a file is safe to download
- How to use voice chat in among us
- How to use sponge rollers