Ultimate Guide: How to Easily Replace a Microwave Lightbulb

-
Quick Links:
- 1. Introduction
- 2. Understanding Microwave Lightbulbs
- 3. When to Replace Your Microwave Lightbulb
- 4. Gathering the Right Tools
- 5. Step-by-Step Guide to Replacing the Bulb
- 6. Safety Tips to Keep in Mind
- 7. Common Issues and Troubleshooting
- 8. Expert Insights on Microwave Maintenance
- 9. Case Studies: Real-Life Experiences
- 10. FAQs
1. Introduction
Replacing a microwave lightbulb may seem like a daunting task, but with the right guidance, it can be a straightforward and rewarding DIY project. Whether your microwave light has dimmed or gone out completely, knowing how to replace it can save you time and money. In this guide, we will explore everything you need to know, from understanding the different types of microwave lightbulbs to step-by-step instructions on how to replace one.
2. Understanding Microwave Lightbulbs
Microwave lightbulbs are specifically designed to withstand the heat and conditions inside a microwave oven. These bulbs are typically smaller and can come in various shapes and wattages. Understanding the type of lightbulb your specific microwave uses is crucial for a successful replacement. Common types include:
- Incandescent Bulbs: These traditional bulbs are often found in older microwave models.
- Halogen Bulbs: These are brighter and more energy-efficient, commonly used in modern microwaves.
- LED Bulbs: The most energy-efficient option, they have a longer lifespan and generate less heat.
3. When to Replace Your Microwave Lightbulb
There are several signs that indicate it's time to replace your microwave lightbulb:
- The light flickers or dims intermittently.
- The light does not turn on when the microwave is in operation.
- You notice a burnt-out bulb smell or see visible damage to the bulb.
Regular maintenance checks can help identify these issues early on, ensuring your microwave operates efficiently.
4. Gathering the Right Tools
Before you start the replacement process, it’s essential to gather the right tools. Here’s what you’ll need:
- Screwdriver: A Phillips or flathead, depending on your microwave model.
- Replacement Bulb: Ensure it matches the specifications of your old bulb.
- Gloves: To protect your hands from sharp edges and prevent skin oils from affecting the new bulb.
- Towel: To catch any debris or broken glass.
5. Step-by-Step Guide to Replacing the Bulb
Follow these detailed steps to replace your microwave lightbulb:
Step 1: Unplug the Microwave
Safety first! Always unplug the microwave before starting any repair work.
Step 2: Access the Lightbulb Compartment
Some models have a protective cover over the lightbulb. Use your screwdriver to remove any screws and gently take off the cover.
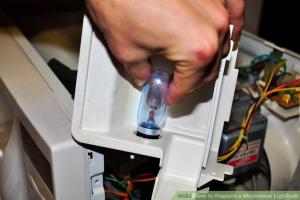
Step 3: Remove the Old Bulb
Carefully unscrew the old bulb. If it’s stuck, use a towel for better grip. Remember to dispose of it properly.
Step 4: Install the New Bulb
Screw in the new bulb gently, ensuring it is secure but not overly tight. Replace the protective cover if applicable.
Step 5: Test the Microwave
Plug the microwave back in and run it to test if the new bulb works correctly.
6. Safety Tips to Keep in Mind
When replacing a microwave lightbulb, consider these safety tips:
- Always unplug the microwave before beginning any repairs.
- Wear gloves to protect against sharp edges and glass.
- Handle the bulb with care to avoid breakage.
7. Common Issues and Troubleshooting
Sometimes, even after replacing the bulb, you may encounter issues. Here are some common problems and solutions:
- New Bulb Won't Light: Ensure the bulb is securely in place and check the microwave's fuse.
- Flickering Light: This could indicate a faulty socket or wiring issue.
8. Expert Insights on Microwave Maintenance
Experts recommend regular checks on your microwave's lightbulb and other components as part of routine maintenance. Keeping your appliance clean and ensuring all parts are functioning can extend its lifespan significantly.
9. Case Studies: Real-Life Experiences
Consider the story of a homeowner who noticed her microwave light flickering. After following a similar replacement process, not only did the light work, but she also discovered a loose connection, which could have led to a more significant issue if left unchecked.
10. FAQs
FAQs
1. What type of lightbulb does my microwave use?
The type of lightbulb varies by model; check your manual for specifications.
2. How often should I replace my microwave lightbulb?
Replace it when it burns out or dims significantly, typically every 1-2 years if used regularly.
3. Can I use a regular light bulb in my microwave?
No, you should use a bulb specifically designed for microwave use to avoid hazards.
4. Is it safe to replace the bulb myself?
Yes, as long as you follow safety precautions and instructions.
5. What if the new bulb doesn’t work?
Check the bulb installation, and ensure the microwave is correctly plugged in and functional.
6. Can I use an LED bulb in my microwave?
Yes, as long as it’s rated for microwave use and matches your microwave's specifications.
7. Do I need to turn off the circuit breaker when replacing the bulb?
It’s not mandatory, but it’s a good safety practice to turn off the circuit breaker for added safety.
8. Can I replace the bulb while the microwave is still hot?
No, always wait for the microwave to cool down to avoid burns.
9. Where can I find replacement bulbs?
Replacement bulbs are available at home improvement stores, appliance stores, and online retailers.
10. How can I prevent future bulb issues?
Regular maintenance and cleaning can help prevent issues with microwave bulbs.
Random Reads